Add On Screen Recorder: Your Complete Setup Guide
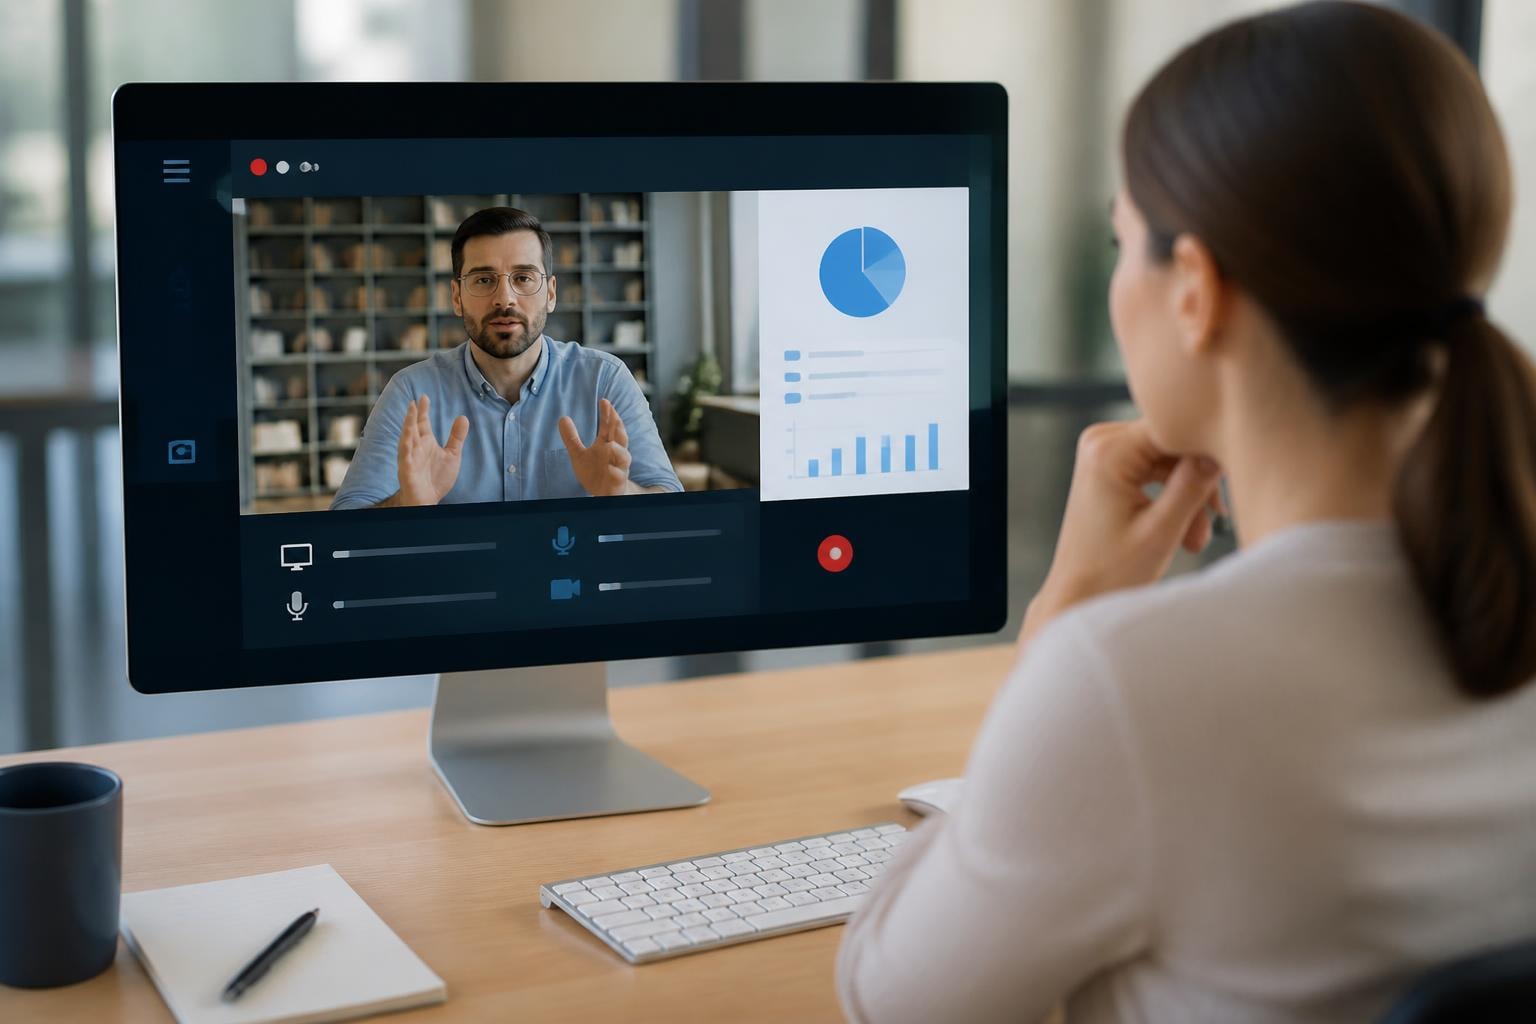
Screen recording has become essential for remote work, online education, and content creation. But installing heavyweight desktop software isn't always practical or necessary. That's where an add on screen recorder comes in handy. These lightweight browser extensions let you capture your screen without downloading bulky programs or navigating complicated setup processes. Whether you're creating tutorials, recording meetings, or documenting bugs, the right add on screen recorder can streamline your entire workflow and keep everything in one place.
Why Choose an Add On Screen Recorder Over Desktop Software
Desktop screen recording applications have their place, but browser-based solutions offer unique advantages that make them the go-to choice for many users. The most obvious benefit? Zero installation hassle. You don't need administrator privileges or gigabytes of storage space.
Instant Accessibility and Cross-Platform Compatibility
When you use an add on screen recorder, you're getting a tool that lives in your browser. This means you can access it from any computer where you're logged into your browser account. Switched from your work laptop to your home desktop? Your recording tool follows you automatically.
The browser-based approach also eliminates compatibility headaches. Whether you're on Windows, macOS, or Linux, the same extension works identically. Compare this to traditional screen recording methods that require platform-specific software.
Key advantages include:
- No system resource drain when not actively recording
- Automatic updates through the browser's extension manager
- Seamless integration with web-based tools and platforms
- Quick sharing options built directly into the interface
Storage and Sharing Made Simple
Traditional recording software saves files locally, forcing you to manage storage, find the files, and manually upload them for sharing. Browser-based recorders typically offer cloud integration from the start. Record a video, get a shareable link instantly, and move on with your day.
What to Look for in an Add On Screen Recorder
Not all browser extensions are created equal. The market is flooded with options, but only a handful deliver professional-grade features without overwhelming casual users. Here's what separates the excellent from the mediocre.
Essential Features That Matter
| Feature | Why It Matters | What to Expect |
|---|---|---|
| Audio capture | Records system audio and microphone simultaneously | Multiple input options, noise reduction |
| Tab vs. full screen | Flexibility in what you record | Choose specific tabs, windows, or entire screen |
| Webcam overlay | Adds personal touch to tutorials | Adjustable position and size |
| Annotation tools | Mark up videos during recording | Drawing, arrows, text labels |
| Password protection | Secure sensitive content | Link-level security controls |
The best add on screen recorder solutions don't just capture video, they enhance your entire communication workflow. Look for tools that understand context. Can you trim videos after recording? Add captions? Search through your recordings later?
Performance Considerations
Speed matters more than you'd think. An extension that crashes mid-recording or produces laggy video isn't worth your time, even if it's free. Check user reviews for mentions of stability and performance.
Performance indicators to evaluate:
- Frame rate consistency – Does it maintain smooth 30fps or 60fps?
- CPU usage – Will it slow down your other browser tabs?
- Upload speed – How quickly does it process and share finished videos?
- File size optimization – Are videos compressed efficiently?
Setting Up Your Add On Screen Recorder
Getting started is straightforward, but a few extra steps during setup can save headaches later. Let's walk through the process from installation to your first recording.
Installation and Permissions
Browse to your browser's extension store and search for your chosen add on screen recorder. Click "Add to Browser" and you'll see a permissions request. These typically include:
- Access to capture screen content
- Microphone permissions for audio recording
- Storage permissions for saving videos
- Sometimes camera access for webcam overlay
Don't panic about permissions. Screen recorders legitimately need these to function. However, stick with reputable extensions from known developers. Check ratings and review counts before installing anything.
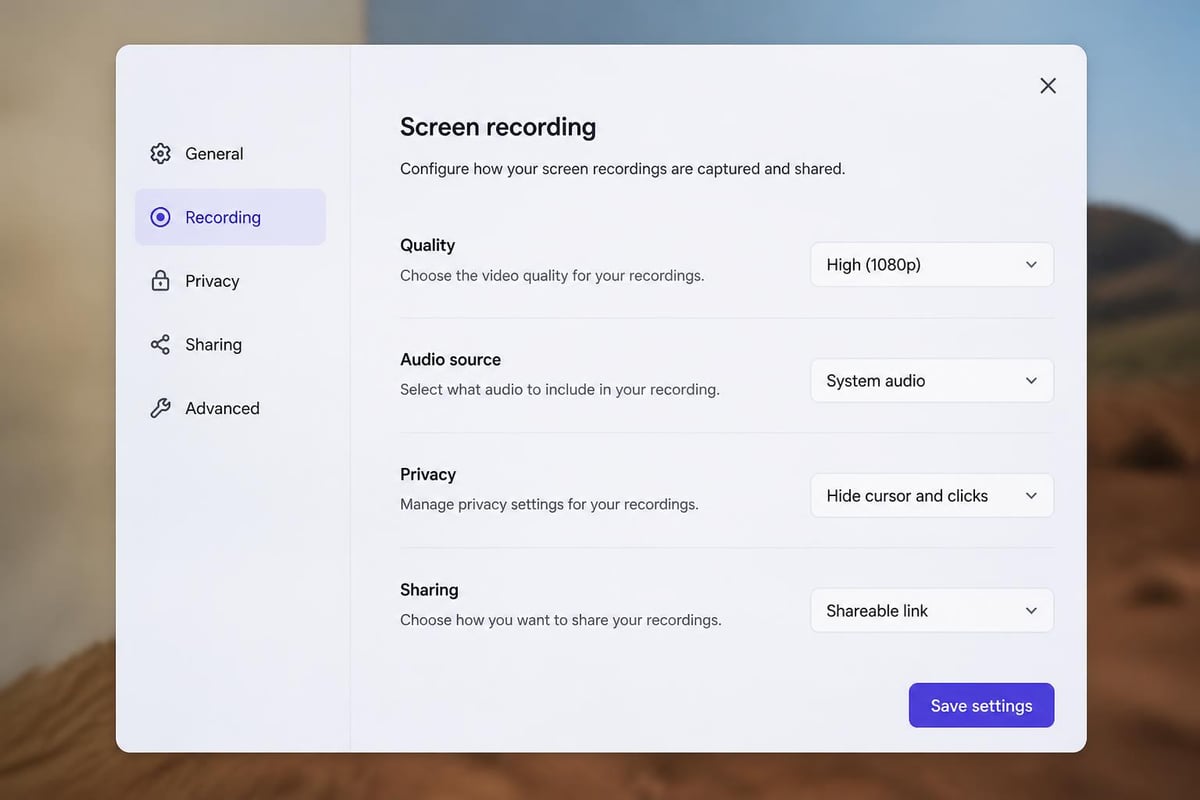
Configuring Your Initial Settings
After installation, click the extension icon in your browser toolbar. Most tools walk you through a quick setup wizard. You'll typically configure:
- Default recording quality (720p vs 1080p vs 4K)
- Audio input sources (microphone, system audio, or both)
- Hotkey preferences for starting and stopping recordings
- Storage location (local vs cloud)
Take time here. These settings affect every recording you make. If you're creating professional tutorials or demos, higher quality settings make sense. For quick bug reports, lower quality saves time and storage.
Using Your Add On Screen Recorder Effectively
Installation is just the beginning. The difference between amateur and professional-looking recordings often comes down to technique and workflow, not expensive equipment.
Recording Best Practices
Preparation prevents problems. Before hitting record, close unnecessary tabs and applications. A cluttered screen looks unprofessional and distracts viewers. Clear your browser bookmarks bar if it contains sensitive information. Check that your microphone works and background noise is minimal.
When you're ready to start:
- Click your add on screen recorder extension icon
- Choose what to record (specific tab, window, or entire screen)
- Select audio sources (microphone, system audio, or both)
- Add webcam if needed
- Hit the record button
During recording, speak clearly and pause between thoughts. This makes editing easier later. If you make a mistake, don't stop. Just pause, collect yourself, and continue. You can trim errors in post-production.
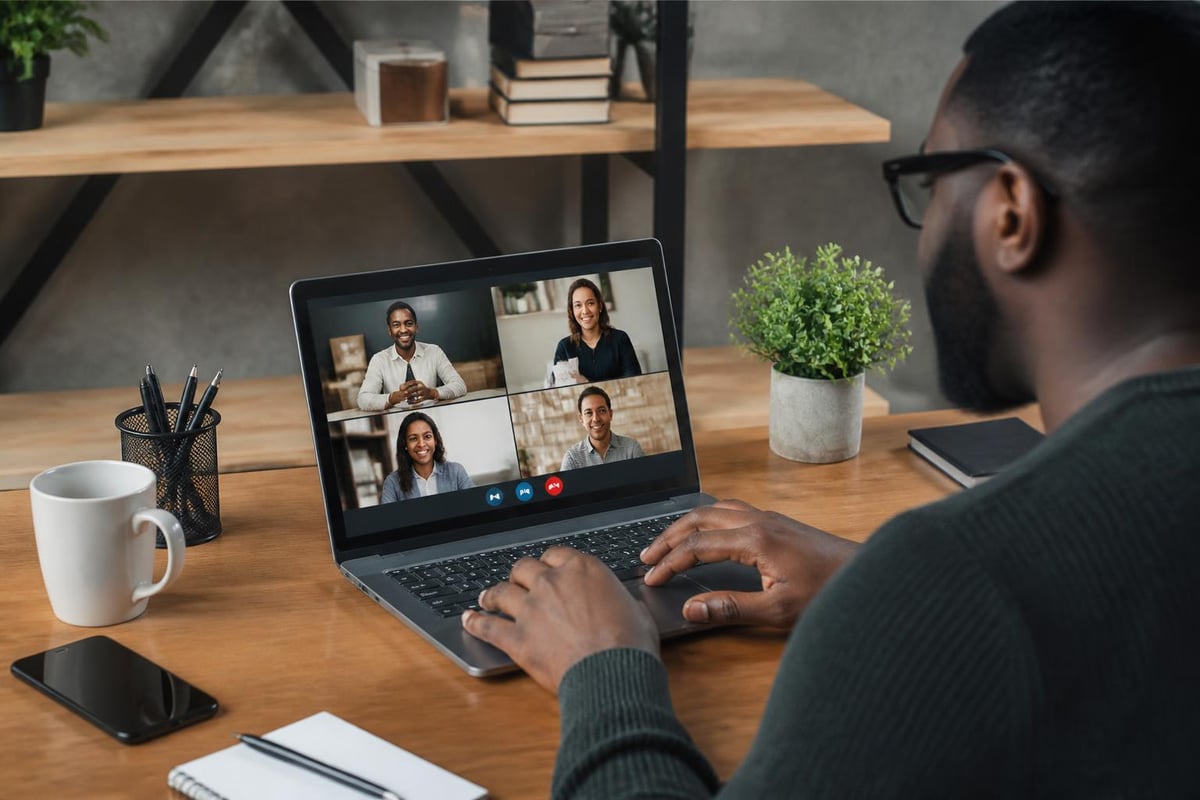
Common Recording Scenarios
Different situations call for different approaches. Here's how to optimize your add on screen recorder for specific use cases:
| Use Case | Best Settings | Pro Tips |
|---|---|---|
| Software tutorials | Full screen, 1080p, system audio + mic | Use annotation tools to highlight UI elements |
| Meeting recordings | Specific tab, 720p, all audio sources | Start 2 minutes early to catch latecomers |
| Bug reports | Specific window, 720p, mic only | Record the bug, explain steps, show expected behavior |
| Presentations | Full screen, 1080p, mic + webcam | Practice once before the actual recording |
For those working across different browsers, you might want to check out options for Firefox screen capture or Chrome screen recording with audio to understand platform-specific features.
Advanced Features Worth Exploring
Once you're comfortable with basic recording, advanced features can dramatically improve your output quality and efficiency. Modern add on screen recorder tools pack surprising power into small packages.
AI-Powered Enhancements
The latest generation of browser-based recorders incorporates artificial intelligence to make videos more useful. Some tools can automatically transcribe your recordings, making them searchable. Imagine recording a 30-minute training session and later searching for "the part where I explained the refund process." The AI finds it instantly.
Searchable video transforms how teams use recordings. Instead of rewatching entire videos, team members jump directly to relevant sections. This is particularly valuable for onboarding materials and product documentation.
Collaboration and Review Features
Screen recordings shouldn't be one-way broadcasts. The best add on screen recorder options enable dialogue. Look for features like:
- Time-stamped comments where viewers can ask questions at specific moments
- Annotation tools that let reviewers mark up videos with feedback
- Version control for iterating on training materials
- View analytics to see who watched what and for how long
These features matter most in team environments. If you're creating content for colleagues, clients, or students, interactive features increase engagement significantly.
Privacy and Security Considerations
Recording screens means capturing potentially sensitive information. A responsible approach to privacy protects both you and your audience.
What Gets Recorded (And What Doesn't)
Your add on screen recorder captures exactly what you tell it to. Choose "specific tab" to record just one browser tab. Everything else stays private. Select "entire screen" and you're capturing everything, including notifications, emails, and any other windows.
Before recording:
- Close tabs with personal information
- Disable notifications temporarily
- Hide browser extensions you don't want visible
- Clear clipboard if you'll paste anything sensitive
Sharing Securely
Not every recording should be public. Many add on screen recorder tools offer password protection for shared links. Some provide link expiration dates, automatically removing access after a set time.
Mool takes security seriously by offering password protection and granular sharing controls, ensuring your screen recordings only reach intended viewers while making it easy to share knowledge across your team.
Consider who needs access before sharing. Can you send to specific email addresses only? Is public link sharing necessary, or would restricted access work better?
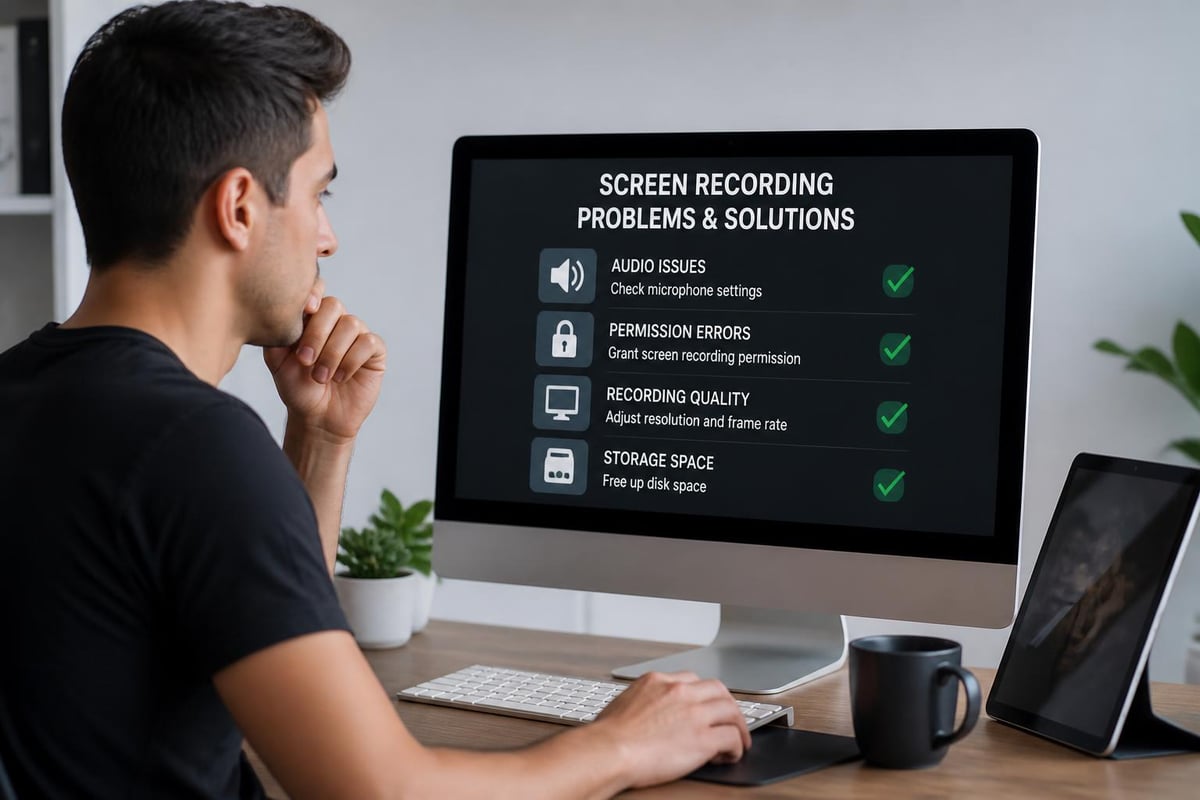
Troubleshooting Common Issues
Even the most reliable add on screen recorder occasionally hiccups. Here's how to solve the most frequent problems quickly.
Audio Problems
No audio in playback? This is usually a permissions issue. Check that you granted microphone access when installing the extension. In your browser settings, verify the recorder has permission to access your microphone and system audio.
Sometimes the wrong audio source is selected. Open your add on screen recorder settings and confirm both microphone and system audio are enabled if you need both.
Performance and Quality Issues
Laggy recordings or dropped frames typically indicate CPU overload. Close other applications and browser tabs before recording. Lower your recording quality from 1080p to 720p if performance doesn't improve.
Black screen recordings happen when screen capture permissions aren't properly set. Reinstall the extension and carefully grant all requested permissions. On some systems, you need to allow screen recording in system preferences separately from browser permissions.
If you're looking for alternatives, comparing the best free screen recorder options can help identify tools that work better with your specific setup.
Integrating Screen Recording Into Your Workflow
The most successful screen recorder users don't just capture videos randomly. They build recording into systematic workflows that create lasting value.
Building a Knowledge Base
Every screen recording you make is potential documentation. Instead of explaining the same process repeatedly, record it once and share the link. Over time, you build a library of searchable resources.
Organization strategies:
- Use consistent naming conventions (date, topic, audience)
- Tag recordings by category or department
- Create playlists for onboarding sequences
- Update outdated recordings quarterly
For teams managing multiple recordings, having a central hub like share.mool.video keeps everything organized and accessible.
Recording Cadences for Different Goals
| Goal | Recording Frequency | Content Type |
|---|---|---|
| Customer support | As issues arise | Bug reports, feature explanations |
| Team training | Weekly or monthly | Process updates, new features |
| Product updates | With each release | What's new, how to use it |
| Sales enablement | Quarterly | Product demos, competitive positioning |
Regular recording builds institutional knowledge that survives employee turnover and reduces repetitive questions.
Comparing Popular Add On Screen Recorder Options
The browser extension market offers dozens of choices. While we can't review every option, understanding the landscape helps you make informed decisions.
Free vs. Paid Considerations
Free add on screen recorder tools typically limit recording length (often 5-10 minutes), add watermarks, or restrict sharing options. For occasional use, these limitations might not matter. Creating regular content? The restrictions become frustrating fast.
Paid options usually offer:
- Unlimited recording time
- Higher quality outputs (up to 4K)
- Cloud storage without caps
- Advanced editing built-in
- Team collaboration features
- Priority support
Many tools offer free trials. Test extensively before committing. Record the types of content you'll actually create. Share with real colleagues. Verify performance under your typical workload.
Specialized vs. General-Purpose Tools
Some recorders focus narrowly on specific use cases. Others try to be everything to everyone. General-purpose screen recorders work for most people, but specialized tools excel in particular scenarios.
Game streamers need features like FPS counters and stream overlays. Educators prioritize annotation tools and student analytics. Software developers want precise cursor highlighting and keyboard shortcut displays.
Match the tool to your primary use case. A feature-packed option you never use isn't better than a simple tool that does exactly what you need.
Making Your Recordings More Engaging
Technical quality matters, but engaging content keeps viewers watching. A few simple techniques dramatically improve your recordings' effectiveness.
Script or Outline Your Content
Rambling recordings waste everyone's time. Spend five minutes outlining what you'll cover before launching your add on screen recorder. You don't need a word-for-word script, but knowing your key points prevents awkward pauses and meandering explanations.
Simple outline structure:
- Introduction (15 seconds): What you'll show and why it matters
- Main content (80% of time): Step-by-step demonstration
- Recap (15 seconds): Key takeaways and next steps
Visual Polish That Doesn't Require Editing
You can make recordings look professional without spending hours in video editors. Maximize your browser window to reduce distractions. Use a clean, simple browser theme. Zoom in on small text or UI elements so viewers can actually read them.
Cursor movement matters more than you think. Move deliberately between clicks. Circle important areas with your mouse to draw attention. When typing, slow down slightly so viewers can follow along.
If you're interested in adding more polish, exploring how to record video with virtual backgrounds can help create more professional-looking content.
Screen Recording Etiquette and Best Practices
As screen recording becomes ubiquitous, informal norms have emerged around when, what, and how to record. Following these conventions makes you a better digital citizen.
Getting Consent for Meetings
Recording conversations without permission isn't just rude, it might be illegal depending on your location. Always announce when you're recording and get explicit consent from participants. Most add on screen recorder tools make this easy with countdown timers that give people warning.
In formal meetings, add recording plans to the agenda. In casual conversations, ask first: "Mind if I record this for reference?" Most people won't object if you ask respectfully.
Accessibility Considerations
Not everyone consumes content the same way. Making your recordings accessible isn't just considerate, it often improves the experience for everyone.
Add captions whenever possible. Many modern add on screen recorder platforms generate automatic transcripts that you can edit for accuracy. Captions help viewers in noisy environments, non-native speakers, and people with hearing impairments.
Describe what you're doing verbally as you do it. Don't just click silently through menus. Saying "Now I'm clicking the Settings icon in the top right corner" helps viewers follow along and makes the video useful for people using screen readers.
Future Trends in Browser-Based Recording
The add on screen recorder space evolves rapidly. Understanding upcoming trends helps you choose tools that will stay relevant.
AI Integration Deepens
We're already seeing automatic transcription and searchability. Next comes AI-generated summaries, automatic chapter markers, and intelligent cropping that keeps the action centered in frame.
Some experimental tools can watch your screen recording and generate written documentation automatically. Record yourself completing a task once, get step-by-step instructions as a side effect.
Real-Time Collaboration Features
Future add on screen recorder tools will blur the line between recording and live collaboration. Imagine co-recording with a colleague in real-time, each capturing your own screen while maintaining a shared audio track. Or recording yourself while remote team members add comments and annotations in real-time.
Emerging capabilities include:
- Multi-user simultaneous recording sessions
- Live viewer counts and engagement metrics
- Interactive elements embedded in recordings
- Automatic version control for iterative content
The goal is making recorded content feel less like static videos and more like living documents that grow and improve over time.
Finding the right add on screen recorder transforms how you communicate, teach, and collaborate online. The best tools disappear into your workflow while making every explanation clearer and more reusable. If you're ready to turn your browser into a powerful recording studio, Mool offers everything you need: instant recording, AI-powered searchability, secure sharing, and annotation tools that make your videos genuinely useful. Start recording smarter today and watch your productivity soar.