Desktop Screen Recorder Windows 10: Complete Guide 2026
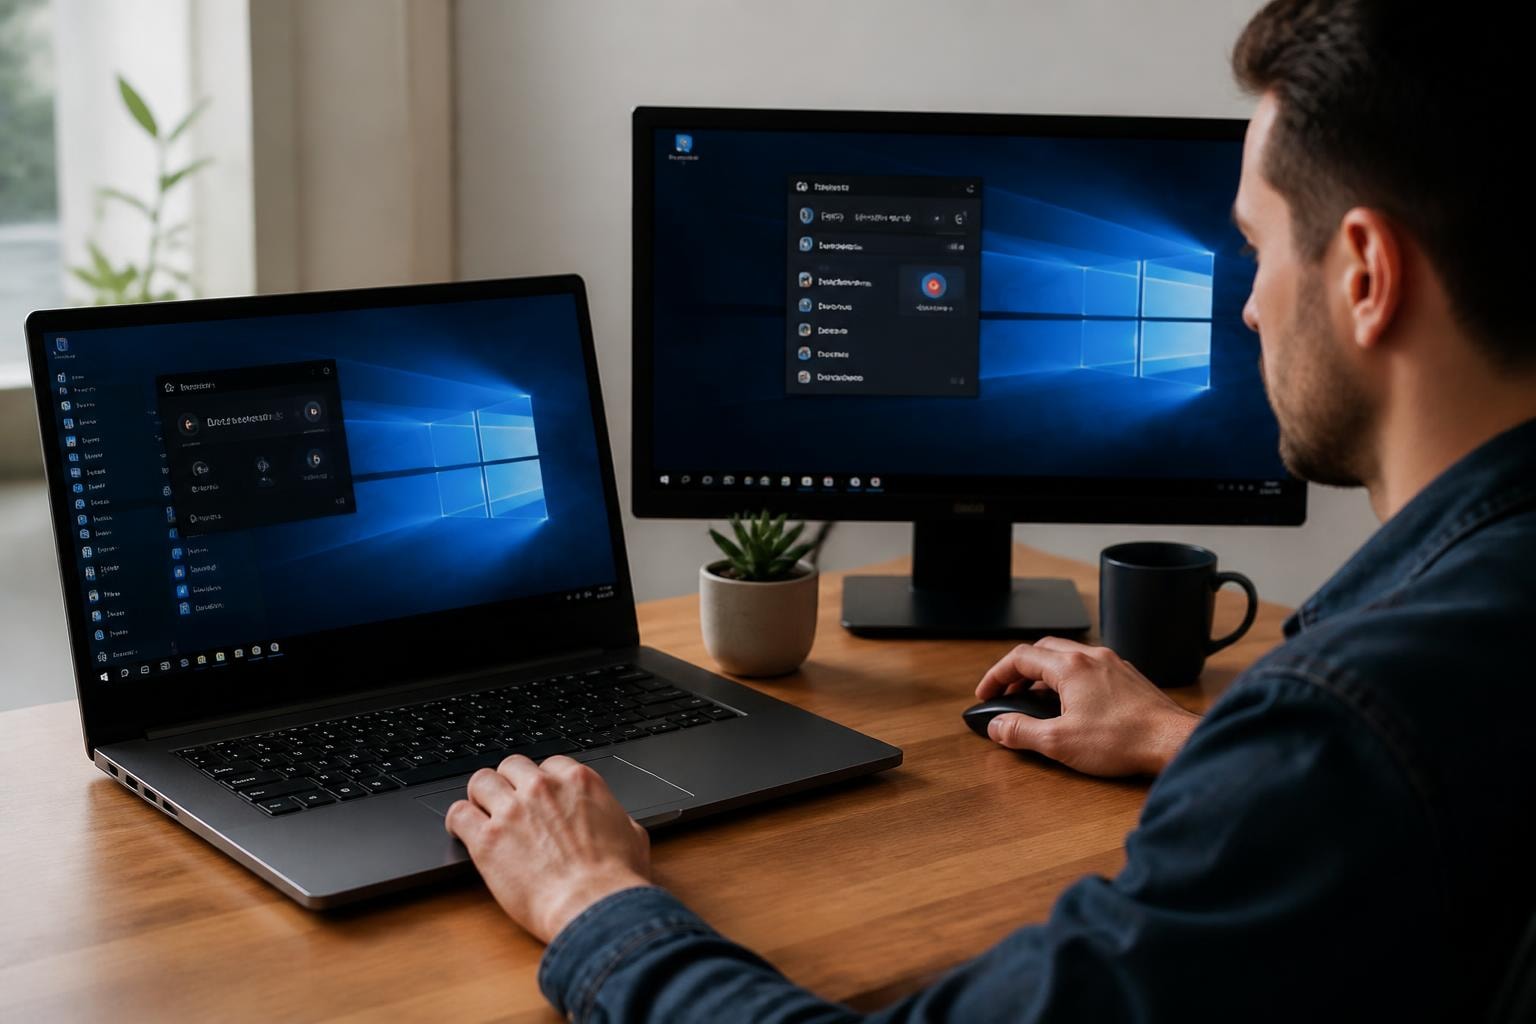
Finding the right desktop screen recorder Windows 10 tool can transform how you create tutorials, document processes, or share ideas with your team. Whether you're capturing gameplay, recording presentations, or creating training videos, Windows 10 offers several built-in and third-party options that can handle the job. The challenge isn't finding a screen recorder-it's finding one that matches your specific needs without overwhelming you with features you'll never use.
Why Windows 10 Screen Recording Still Matters in 2026
Even though Windows 11 has been around for a while, millions of users still rely on Windows 10 for their daily work. You might be thinking, "Isn't Windows 10 outdated?" Not really. It's stable, familiar, and gets the job done for most people.
When it comes to screen recording, Windows 10 actually has some solid options right out of the box. The Xbox Game Bar has been a lifesaver for quick recordings, and third-party tools have only gotten better over the years. Plus, if you're working in a corporate environment, chances are your IT department hasn't rushed to upgrade everyone to Windows 11 yet.
The recording landscape has changed significantly:
- Built-in tools have become more powerful
- Browser-based solutions now rival desktop applications
- Cloud integration has become standard
- AI-powered features are transforming how we work with recordings
Using Xbox Game Bar for Quick Screen Captures
The Xbox Game Bar is Windows 10's secret weapon for screen recording. Yeah, it's technically designed for gamers, but it works perfectly for recording any application window. You've probably walked right past this feature without realizing it's there.
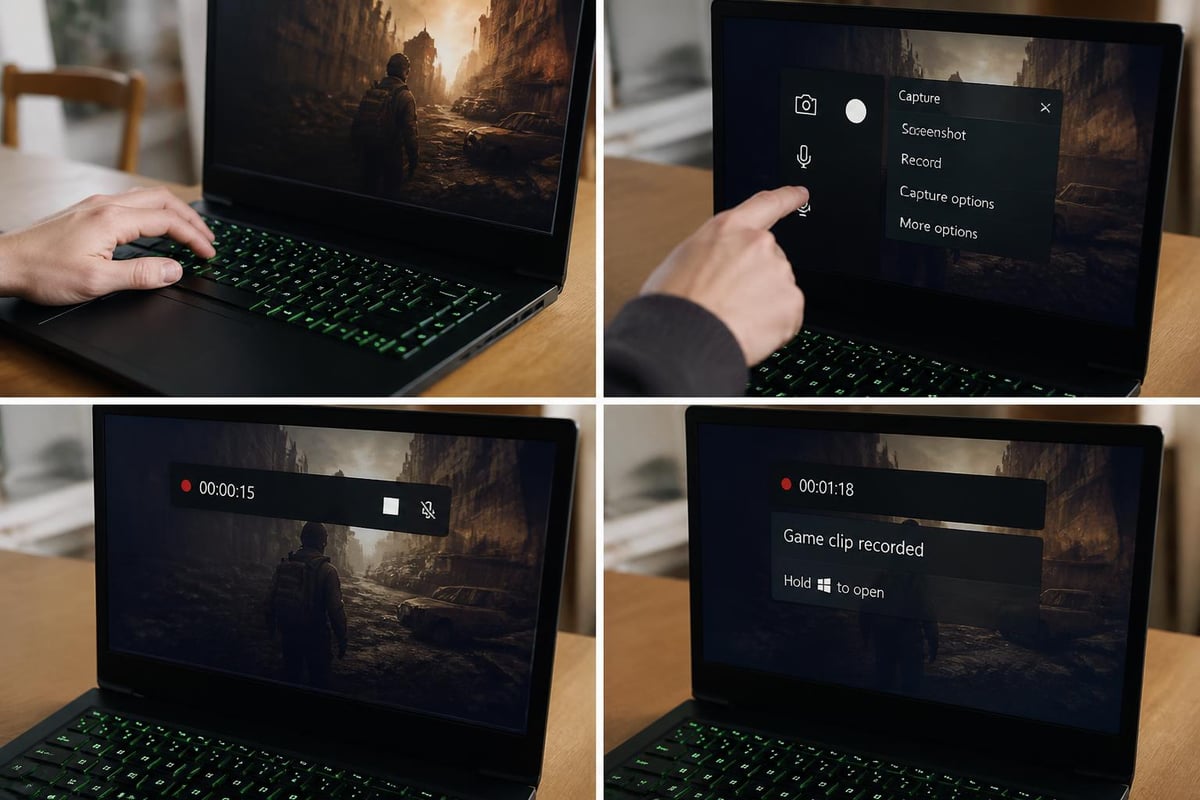
Getting Started with Game Bar
Press Windows + G and boom-you're in. The overlay appears with recording controls right there on your screen. Using Windows 10's built-in screen capture tool is surprisingly straightforward once you know where to look.
Here's what you need to know:
- Open the application you want to record
- Press Windows + G to launch Game Bar
- Click the record button (or press Windows + Alt + R)
- Do your thing on screen
- Press Windows + Alt + R again to stop
Your videos automatically save to the Videos/Captures folder. No fussing with export settings or file locations unless you want to change them in the settings.
Game Bar Limitations You Should Know
Let's be real-Game Bar isn't perfect. It can only record one application window at a time, which means you can't capture your entire desktop or switch between programs during recording. If you need to show multiple windows or demonstrate desktop-level workflows, you'll need something more robust.
| Feature | Available | Limited | Not Available |
|---|---|---|---|
| Window recording | ✓ | ||
| Audio capture | ✓ | ||
| Webcam overlay | ✓ | ||
| Desktop recording | ✓ | ||
| Annotation tools | ✓ | ||
| Multiple monitors | ✓ |
The quality is decent for most purposes, but you're not getting professional-grade output here. It's perfect for quick demos or sharing something with a colleague, but maybe not ideal for polished marketing videos.
Third-Party Desktop Screen Recorder Windows 10 Solutions
When the built-in tools don't cut it, third-party software steps up to the plate. The market is flooded with options ranging from completely free to enterprise-level expensive. Guiding Tech reviews several screen recording applications that can help you pick the right fit.
OBS Studio: The Power User's Choice
OBS Studio is the heavyweight champion of screen recording. It's completely free, open-source, and packed with features that would cost hundreds of dollars in other software. But here's the catch-there's definitely a learning curve.
What makes OBS Studio stand out:
- Record unlimited length videos
- Mix multiple sources (screen, webcam, audio)
- Stream directly to platforms like YouTube or Twitch
- Customize every aspect of your recording
- Use plugins to extend functionality
The downside? You'll spend some time figuring out scenes, sources, and settings. How-To Geek discusses OBS and other powerful screen recording options for users who need advanced features.
ShareX: Free and Feature-Rich
ShareX deserves way more attention than it gets. This free tool handles screen recording, screenshots, and file sharing all in one package. It's lighter than OBS but still gives you plenty of control over your recordings.
You can set up hotkeys for everything, choose specific regions to record, and even automatically upload your videos to cloud storage. The interface looks a bit busy at first, but once you customize it to your workflow, it becomes second nature.
Paid Options Worth Considering
Sometimes free tools don't quite meet business requirements. Camtasia and Snagit from TechSmith are the gold standards for professional screen recording on Windows. They're not cheap, but they include built-in editing, effects, and templates that can save hours of work.
Bandicam is another solid choice that sits somewhere between free and premium options. It offers high-quality recordings without completely destroying your computer's performance during capture.
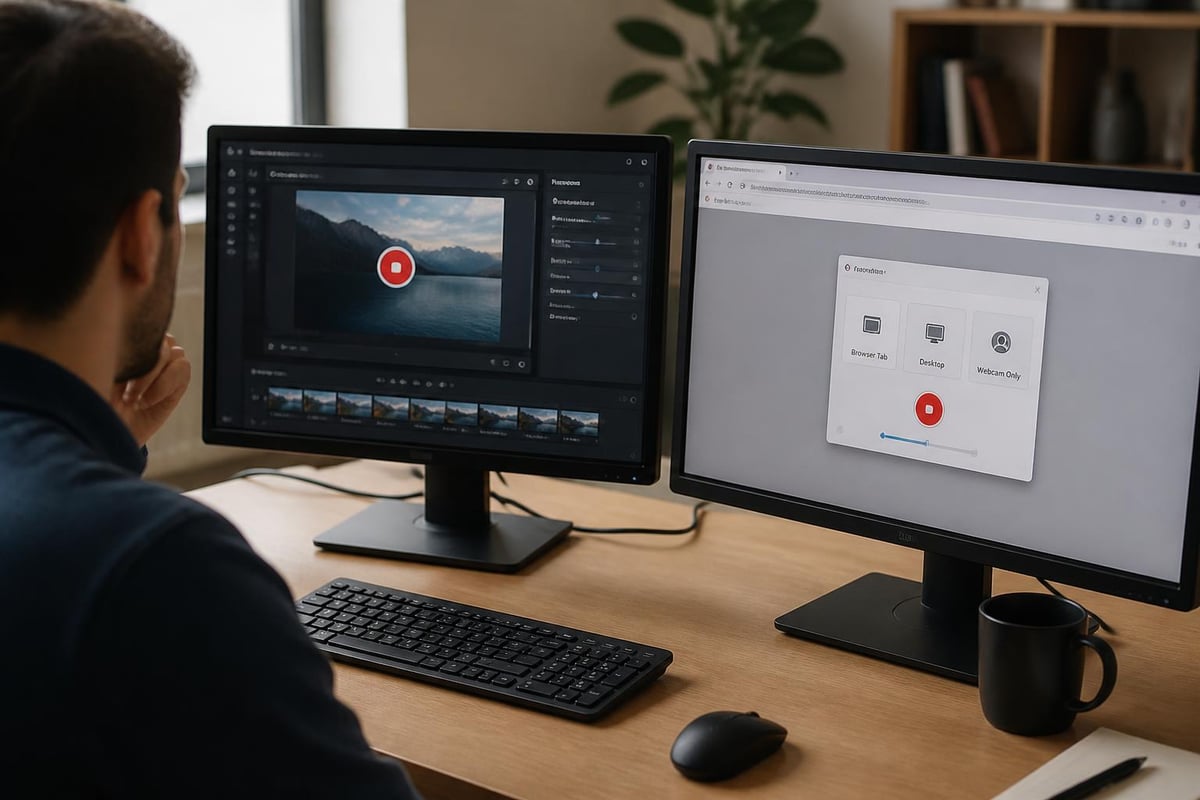
Browser-Based Recording: The Modern Alternative
Here's where things get interesting. Why install desktop software when your browser can handle screen recording? Browser extensions have evolved dramatically, offering capabilities that used to require dedicated desktop screen recorder Windows 10 applications.
The Rise of Chrome Extension Recorders
Chrome extensions like Mool have changed the game by letting you record, share, and organize videos without leaving your browser. You're not downloading massive software packages or dealing with complicated installations-just add the extension and you're ready to go.
The beauty of browser-based recording is the seamless sharing. Record a video, get a link, send it to your team. No uploading files to Dropbox or dealing with email attachment limits. Plus, features like password protection and built-in annotation tools mean you're not jumping between multiple applications to finish your video.
When Browser Extensions Make More Sense
If you're creating content for work-tutorials, bug reports, feedback videos, client presentations-browser extensions often make more sense than desktop applications. You're probably already working in your browser anyway, so why switch contexts?
Browser extensions excel at:
- Quick feedback and communication videos
- Creating shareable training content
- Documenting processes and workflows
- Collaborative review and annotation
- Instant distribution without file transfers
For more information on browser-based recording options, check out our guide on screen recorder for browser solutions.
Setting Up Your Recording Environment
Having great software means nothing if your recording setup is a mess. You don't need a professional studio, but a few tweaks can dramatically improve your output quality.
Audio Matters More Than You Think
People will forgive mediocre video quality, but bad audio will make them click away instantly. Use a decent microphone if possible-even a $30 USB mic beats your laptop's built-in one. Close unnecessary applications to reduce background noise and notifications.
Test your audio levels before recording anything important. Nothing's worse than finishing a 20-minute tutorial only to discover your microphone wasn't actually recording.
Display Settings and Resolution
Before you hit record:
- Close unnecessary browser tabs and applications
- Turn off notifications (Windows 10 has a Focus Assist mode for this)
- Clean up your desktop if you're recording it
- Check your display scaling-100% usually works best
- Position windows and tools where you want them
Consider your audience's viewing experience. If people will watch on mobile devices, keep important elements away from screen edges and use larger text.
Advanced Recording Techniques for Windows 10
Once you've mastered the basics, these advanced techniques can take your desktop screen recorder Windows 10 output to the next level.
Multi-Monitor Recording Strategies
Recording across multiple monitors gets tricky. Most tools let you select which monitor to capture, but switching between them during recording requires planning. OBS Studio handles this best with scenes that you can switch between on the fly.
Alternatively, consider recording each monitor separately and editing the footage together later. It's more work, but gives you better control over the final product.
Optimizing File Sizes Without Sacrificing Quality
Recording at 1080p for hours will eat your hard drive alive. Here's the balance you need to strike:
| Resolution | Use Case | File Size (per min) | Quality |
|---|---|---|---|
| 720p | Quick demos, internal use | ~50-80 MB | Good |
| 1080p | Professional content | ~100-150 MB | Excellent |
| 1440p | High-detail tutorials | ~200-300 MB | Outstanding |
| 4K | Rarely necessary | ~400+ MB | Overkill |
Most viewers won't notice the difference between 1080p and 4K, especially for screen recordings. Save your storage space and processing power for where it matters.
Adding Professional Polish
The difference between amateur and professional screen recordings often comes down to small details. Add a simple intro and outro. Use cursor highlighting to draw attention to important clicks. Record in quiet environments or use noise suppression tools.
Consider creating templates for common recording scenarios. If you're making product tutorials every week, having a consistent format saves time and looks more professional.
Troubleshooting Common Windows 10 Recording Issues
Even the best desktop screen recorder Windows 10 tools run into problems. Here are the issues you'll probably face and how to fix them.
Performance and Lag Problems
If your recordings are choppy or your computer slows to a crawl during capture, you're pushing your hardware too hard. Lower your recording resolution, close background applications, or upgrade your RAM if this happens frequently.
Quick performance fixes:
- Close Chrome tabs you're not recording
- Disable hardware acceleration in other applications
- Record to a different drive than your OS
- Lower the frame rate to 30fps instead of 60fps
- Use a simpler codec like H.264
Audio Sync Issues
Audio drifting out of sync with video is frustrating but fixable. This usually happens with longer recordings. Use constant frame rate (CFR) instead of variable frame rate (VFR) in your recording settings. PCWorld outlines methods to record screens with audio that can help prevent sync issues.
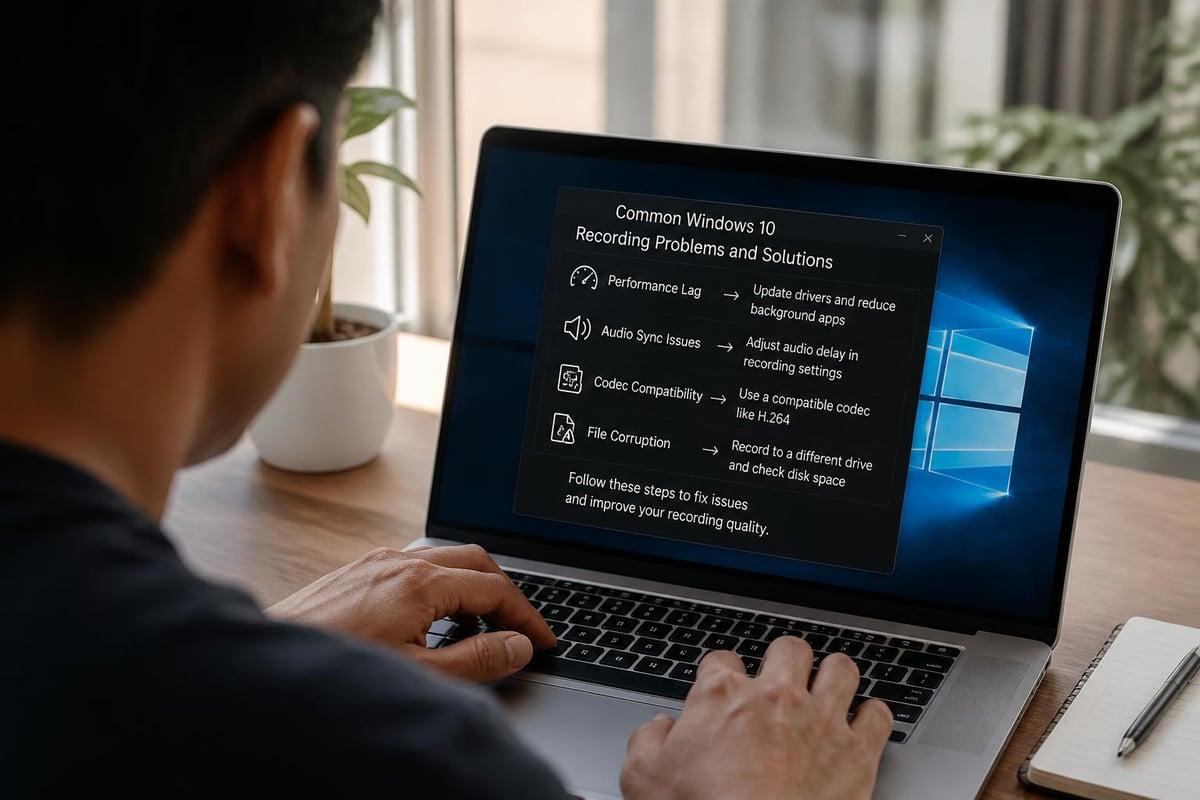
Codec and Compatibility Problems
Recording in obscure codecs might give you smaller files, but good luck playing them on other devices. Stick with H.264 for maximum compatibility. It's supported everywhere and offers a great balance of quality and file size.
If you're sharing videos with people on different platforms, MP4 container format with H.264 video and AAC audio is your safest bet. Everyone can play it without installing special codecs.
Privacy and Security Considerations
Recording your screen means potentially capturing sensitive information. Take precautions to protect yourself and your organization.
What Not to Record
Before starting any recording, think about what's visible on your screen. Password managers, email notifications, private messages, financial information-all these things can accidentally end up in your video if you're not careful.
Use a separate browser profile or clean environment specifically for recording. This keeps your personal bookmarks, history, and saved passwords out of frame.
Secure Sharing Practices
Not every recording should be publicly accessible. Use password protection for sensitive videos, set expiration dates for temporary content, and track who's viewing your shared recordings when possible.
For more secure sharing options, explore features like those offered in free screen capture tools that include built-in privacy controls.
Comparing Windows 10 to Other Platforms
Curious how desktop screen recorder Windows 10 options stack up against Mac or other operating systems? Each platform has strengths and weaknesses.
Windows 10 actually offers more third-party options than macOS, though Mac's QuickTime Player is arguably more polished than Xbox Game Bar. Linux users have excellent free options like SimpleScreenRecorder, but fewer commercial alternatives.
The real advantage of Windows 10 is choice. Whether you want free, paid, simple, or complex, there's a tool that fits. For comparison, check out screenrecording on mac to see how the other side handles it.
Choosing the Right Tool for Your Needs
With so many desktop screen recorder Windows 10 options available, how do you actually choose? Start by honestly assessing what you need.
Ask yourself these questions:
- How often will I be recording?
- Do I need editing capabilities or just raw capture?
- Will I share these videos internally or publicly?
- What's my technical comfort level?
- Is installation approval required in my organization?
For occasional recordings, stick with Xbox Game Bar. It's already there and works fine for basic needs. If you're creating content regularly, invest time learning OBS Studio or consider a paid solution like Camtasia.
Browser-based solutions make sense if you're focused on collaboration and sharing rather than complex productions. They're particularly valuable for remote teams who need to communicate visually.
| User Type | Best Option | Why |
|---|---|---|
| Casual user | Xbox Game Bar | Already installed, simple interface |
| Content creator | OBS Studio | Free, powerful, unlimited features |
| Business professional | Camtasia/Snagit | Polish, templates, support |
| Remote teams | Browser extensions | Easy sharing, collaboration features |
| Developers | ShareX | Automation, customization, lightweight |
Making Your Recordings Actually Useful
Creating the recording is only half the battle. Making it useful to your audience requires some thought. Keep videos focused on one topic or task. Nobody wants to watch a 45-minute rambling screen capture when a 5-minute focused tutorial would do.
Add context before you start showing actions. Explain what you're about to do and why. Use annotations or callouts to highlight important information. Edit out mistakes and long pauses unless you're going for an authentic, real-time feel.
Consider adding a table of contents or chapters for longer videos. This helps viewers jump to the information they need without watching everything. Some tools like Chrome screen recorder with audio solutions include features that make this easier.
The Future of Screen Recording on Windows
Screen recording technology keeps evolving. AI-powered features are starting to appear-automatic transcriptions, smart editing suggestions, and even automated highlight detection. Cloud storage integration is becoming standard, and collaboration features that let teams comment and annotate recordings together are getting more sophisticated.
Windows continues to improve its built-in tools with each update. The Snipping Tool in newer Windows versions includes screen recording now, showing Microsoft's commitment to making this functionality more accessible.
Browser-based tools will likely become even more capable, potentially replacing desktop applications for many users. The convenience of recording without installation and the built-in sharing capabilities are just too compelling for collaborative work environments.
Finding the right desktop screen recorder Windows 10 solution comes down to matching the tool to your workflow and needs. Whether you choose the built-in Xbox Game Bar, a powerful desktop application like OBS Studio, or a browser-based solution, the key is picking something you'll actually use consistently. If you're looking for a streamlined way to record, share, and collaborate on screen recordings without the hassle of desktop software, Mool offers a browser-based solution that turns your recordings into searchable, shareable knowledge with AI-powered features and instant collaboration tools.